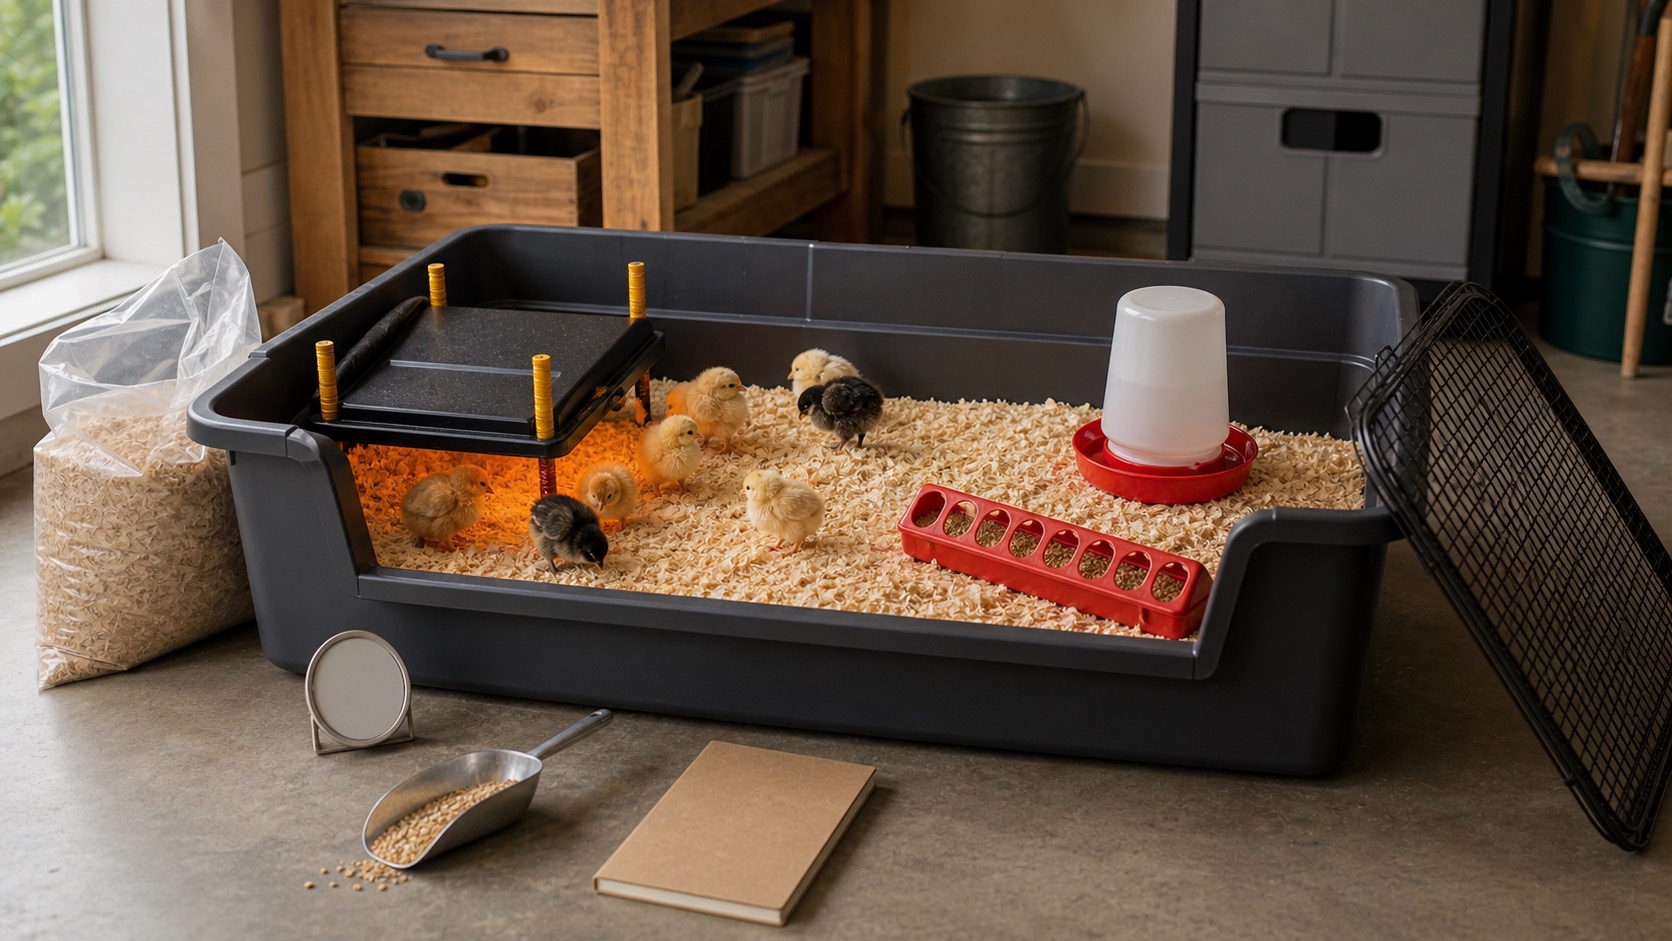
A beginner brooder setup needs safe heat, a warm zone and a cooler zone, chick starter feed, clean water, absorbent bedding, draft protection, pet protection, enough room to grow, and daily observation. It does not need to look charming. It needs to keep chicks warm, dry, fed, watered, contained, and easy to check.
I think beginners get pulled off course because brooder photos make the setup look like a tiny nursery project. It is not really a craft project. It is a short-term life-support system for fragile birds that cannot manage temperature, water, footing, and safety by themselves yet.
The real decision is whether the first week is safe
The first brooder decision is not which container looks best or which accessory makes the setup feel complete. The real decision is whether the first week can be managed without guessing. Can chicks get warm? Can they move away from heat? Can they find water and feed? Can you see them clearly? Can bedding stay dry? Can pets and drafts be kept out?
University of Minnesota Extension’s small-flock guidance gives the practical frame I want to keep close: clean the brooder area before chicks arrive, provide appropriate bedding, start chicks around 90 to 95 degrees F at chick level, reduce heat gradually, and judge comfort by chick behavior as well as the thermometer. That combination matters because numbers alone do not tell the whole story.
A realistic beginner scenario
Picture the day chicks come home. The house still needs dinner, somebody has to answer work messages, the kids want to look in the box every five minutes, and the brooder that seemed simple online suddenly has real animals in it. This is not the moment to be hunting for a thermometer, adjusting a heat source for the first time, or realizing the waterer does not fit.
A calmer version starts the day before. The brooder is assembled. The warm area has been checked at chick level. The waterer and feeder are in place. The bedding is dry. The cover is ready. The family knows that checking chicks is different from constantly handling chicks. That setup gives the first day a chance to be watchful instead of frantic.
What I would set up first
I would start with the container and location. A brooder can be a stock tank, large tote, brooder panel setup, or another safe container, but it has to be big enough for movement, easy enough to clean, and protected from drafts and pets. The best location is not always the prettiest location. It is the place your household can check reliably.
Next comes heat. I would usually compare a brooder plate first because it narrows some of the worries that come with traditional heat lamps. A heat lamp can work, but it demands a careful setup, proper fixture, secure hanging, fire awareness, and regular checking. Whatever you choose, follow the product instructions and watch the chicks. Piling tightly under heat usually means they are cold. Staying far away from heat can mean they are too warm. Moving around, eating, drinking, resting, and peeping normally is the better sign.
Then I would add chick starter feed, a chick feeder, a chick waterer, and bedding. This is where I would not improvise too much. Chicks can spill, scratch, jump, poop, and soak bedding faster than a new keeper expects. A setup that is easy to clean is not a luxury. It is how you keep the first week from becoming a smell, moisture, and stress problem.
Brooder supplies that can earn money
I am comfortable recommending a few brooder items because they solve real care problems instead of decorating the setup. Still, use what you already have when it is safe and functional. The goal is not a prettier brooder. The goal is fewer weak points in the first week.
Recommendations
Brooder basics worth pricing before chicks arrive
Heat first
Adjustable chick brooder heating plate
Compare this first if you want a calmer heat source for a small beginner brooder.
Best for: Beginners who want a lower-drama heat source for a small chick brooder
Check current priceDaily care
Chick feeder and waterer set
Useful because chick-sized equipment helps keep feed and water cleaner than random open dishes.
Best for: First-time keepers who need simple, chick-sized daily-care basics
Check current priceCheck the setup
Brooder thermometer
Useful for checking the warm area before chicks arrive and catching bad guesses during the first week.
Best for: Beginners who need a quick way to verify brooder warmth at chick level
Check current priceWhat can probably wait
Most beginners can delay adult feeders, adult waterers, coop decorations, treats, complicated perches, fancy brooder liners, extra supplements, automatic doors, and storage upgrades that do not solve the first week. Those may have a place later. They do not replace heat, water, feed, bedding, space, and observation.
I would also wait on buying too many backups of the wrong thing. One backup bulb for a lamp setup or one backup heat plan can be sensible. A pile of random chick accessories bought from anxiety usually turns into clutter before it turns into better care.
The safety and care filter
Chicken decisions deserve a stricter filter than ordinary household projects because the animals pay for unclear plans. Before adding birds, buying equipment, or changing a setup, ask whether the choice makes daily care safer, cleaner, easier to observe, or more reliable. If the answer is only that it looks convenient or exciting, it probably belongs later.
The bad-weather version matters too. What happens if the garage gets colder than expected, the power goes out, the waterer spills, a pet gets curious, or the person who planned the brooder is not home for the next check? Beginners do not need fear-based planning, but they do need one backup thought for heat, water, containment, and cleanup.
How to tell if the plan is working
A good brooder leaves evidence. Chicks spread out, eat, drink, rest, and move between warm and cooler areas. Bedding stays mostly dry. Water is easy to refresh. The brooder does not smell sour. You can count the chicks quickly. Cleaning does not require taking the whole setup apart.
The warning signs are just as useful. Chicks piling tightly under heat, staying far away from heat, panting, acting weak, standing in wet bedding, or struggling to find water are not details to ignore. Adjust the setup and get local expert help when something looks wrong.
The useful next step
Before buying anything else, write the brooder plan in one paragraph: where it will sit, how heat will be provided, how warmth will be checked, what feed and bedding you will use, how pets and drafts will be blocked, and what the backup plan is if heat, water, or containment fails.
That may feel less exciting than ordering more chick gear, but it is the part that makes the first week calmer. A brooder should make problems easy to spot. If you cannot tell whether chicks are warm, dry, eating, and drinking, simplify the setup before the birds arrive.
Best Next Step
Use the chicken checklist before you buy more flock gear.
The chicken checklist turns broad advice into an actual setup plan, recurring-cost view, and first-year rhythm.
See the chicken setup basicsRecommended next reads
Read the next guide that supports this decision
These are the next pieces most likely to help the bigger picture make more sense without sending you in ten directions at once.

Chickens
What I’d Buy Before Bringing Home Day-Old Chicks
A practical, safety-first buy list for day-old chicks: brooder, heat, feed, water, bedding, backup supplies, and the gear that can wait.

Chickens
Brooder Plate vs Heat Lamp for Beginners
A practical beginner comparison of brooder plates and heat lamps, including safety, chick behavior, setup friction, and which option usually makes more sense first.
Chickens
How Many Chickens Should a Beginner Start With?
A practical, beginner-first guide to choosing a first flock size without overcommitting on coop space, feed, chores, or your actual week.
Frequently asked questions
What does a beginner brooder actually need?
A beginner brooder needs safe heat, enough space for warm and cool zones, chick starter feed, a chick waterer, absorbent bedding, draft protection, pet protection, and daily observation.
What temperature should a chick brooder be?
Many Extension guides start chicks around 90 to 95 degrees F at chick level for the first week, then reduce heat gradually. Chick behavior matters too: crowding under heat can mean cold, while avoiding heat can mean too warm.
Is a brooder plate or heat lamp better for beginners?
A brooder plate is often easier for beginners to manage calmly, but either option requires following the product instructions, checking chick behavior, and making sure chicks can move away from heat.
What brooder supplies can wait?
Decorative brooder accessories, adult feeders, adult waterers, treats, complicated perches, and extra convenience gadgets can wait until the safe first-week rhythm is working.
Recommendations
Useful tools and resources for this decision
These are included only where they reduce repeated friction, clarify a next step, or help you avoid buying the wrong thing first.
Heat first
Adjustable chick brooder heating plate
A brooder plate is the first heat option I would compare because it can create a calmer warm zone without relying on a dangling heat lamp.
Best for: Beginners who want a lower-drama heat source for a small chick brooder
Check current priceDaily care
Chick feeder and waterer set
A chick-sized feeder and waterer make feed and water easier to keep clean than open dishes that chicks can stand in or spill.
Best for: First-time keepers who need simple, chick-sized daily-care basics
Check current priceCheck the setup
Brooder thermometer
A simple thermometer helps you check the warm zone before chicks arrive, then compare the number with chick behavior once they are in the brooder.
Best for: Beginners who need a quick way to verify brooder warmth at chick level
Check current priceRecommended next reads
Read next if it helps the decision
Move into the next guide only if it clarifies the next practical step.
Chickens
What I’d Buy Before Bringing Home Day-Old Chicks
A practical, safety-first buy list for day-old chicks: brooder, heat, feed, water, bedding, backup supplies, and the gear that can wait.
Chickens
Brooder Plate vs Heat Lamp for Beginners
A practical beginner comparison of brooder plates and heat lamps, including safety, chick behavior, setup friction, and which option usually makes more sense first.
Chickens
How Many Chickens Should a Beginner Start With?
A practical, beginner-first guide to choosing a first flock size without overcommitting on coop space, feed, chores, or your actual week.
Chicken setup support
Get the chicken setup checklist before you buy more flock gear.
Use the first-year checklist to price the flock honestly, cover the starter essentials, and delay the upgrades that can wait.
Best for: Readers trying to price a first flock honestly and avoid a scattered chicken setup.
- A pre-chick setup checklist
- A recurring-cost planning section
- A simple weekly flock-care rhythm
Chicken setup notes, beginner flock lessons, and the checklist first.
After signup, the download will unlock right here so you can save or print it.
About the author
William Mock
Founder, writer, and beginner homesteader
William writes from the beginner side of rebuilding after a layoff: homestead plans, family systems, budgets, tools, and the decisions that make a home feel less fragile.
Read why this site existsRelated Guides
Keep building context
Chickens
What I’d Buy Before Bringing Home Day-Old Chicks
A practical, safety-first buy list for day-old chicks: brooder, heat, feed, water, bedding, backup supplies, and the gear that can wait.
Chickens
Brooder Plate vs Heat Lamp for Beginners
A practical beginner comparison of brooder plates and heat lamps, including safety, chick behavior, setup friction, and which option usually makes more sense first.

Chickens
The Real Cost of Getting Started With Backyard Chickens
Backyard chickens can be a strong first step into homesteading, but the startup costs and recurring work deserve an honest look.