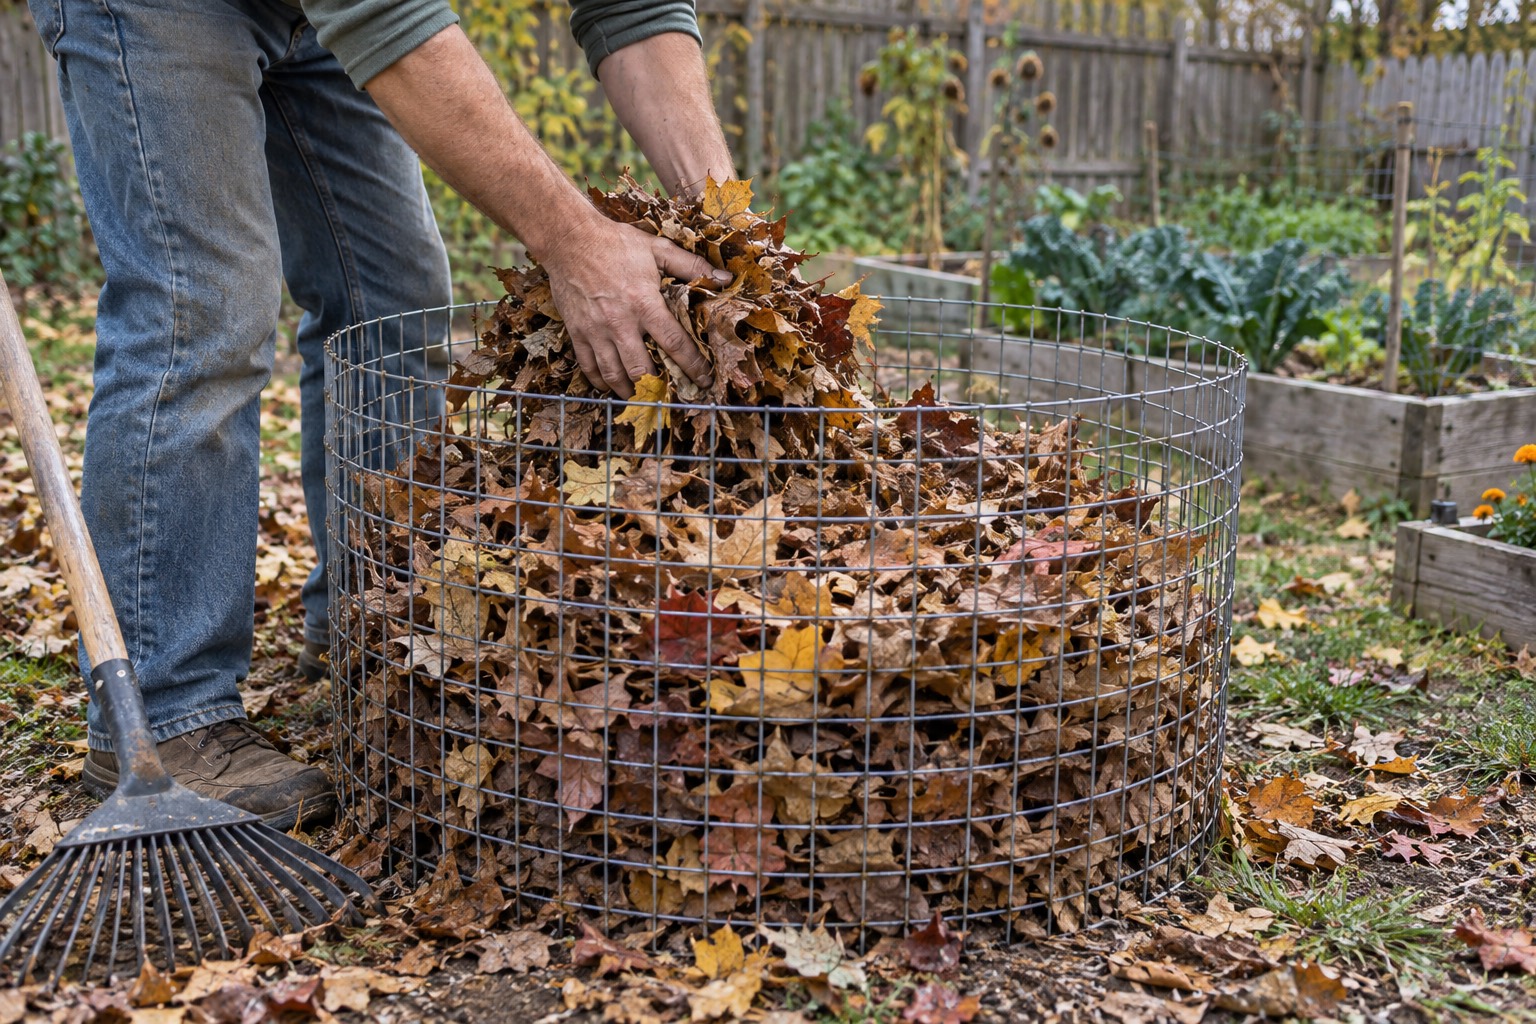
To make leaf mold, gather clean fallen leaves into a loose pile, wire ring, ventilated can, or perforated bag. Moisten them until they feel like a wrung-out sponge, leave room for air, and let fungi and time break them down. Whole leaves may need a couple of years; shredded, consistently damp leaves can finish sooner. The material is ready when it is dark, crumbly, earthy-smelling, and no longer recognizable as a pile of leaves.
This is one focused job inside the beginner gardening plan and a natural next step after the fall garden cleanup decision. It does not mean vacuuming every leaf out of the yard. Leave healthy leaf litter where it supports perennial beds and overwintering habitat, then collect the excess from lawn, paths, drains, and vegetable-growing areas where a managed pile will be more useful.
The handful of mulch that changed how I saw a leaf pile
I wrote in the beginner mulch guide about pulling material back near a plant and finding a different story underneath. The bed looked covered from above, but some soil was still damp, some was thin and crusty, and a few stems had mulch tucked too close. That small check taught me to stop judging garden material by whether the surface looked finished.
Fall leaves create the same temptation in reverse. A cleared lawn and a row of bags can look finished, while a loose pile in the corner can look like one more job waiting. But the pile may be the part doing useful work. Once leaves become leaf mold, they can cover bare soil, help a bed hold moisture, and return organic material to the garden.
That is the personal rule I carry into this job: do not clean up a resource until you have decided whether it belongs somewhere better. I still want paths clear, drains open, lawn protected, and diseased debris handled carefully. I just do not want neatness to make every decision before the garden gets a vote.
Know whether you are making leaf mold or compost
Leaf mold and finished compost can look similar, but they begin with different recipes. Leaf mold is mostly decomposed deciduous leaves. It is a slow, fungal process and does not need a carefully balanced stream of kitchen scraps, grass clippings, manure, or other nitrogen-rich greens. Compost combines greens and browns and is usually managed for faster decomposition.
If you want to manage kitchen scraps and yard waste together, use the beginner composting guide. If the immediate problem is a temporary mountain of autumn leaves, leaf mold is the calmer system. Some of the stockpile can also become the dry brown material your regular compost needs next spring and summer. Before sending kitchen scraps outside after freezing weather arrives, make a separate winter composting plan for access, moisture, pests, and capacity.
Sort the leaves before they enter the pile
A leaf-mold pile is not a place to hide every yard problem. Use ordinary deciduous leaves that are reasonably free of trash, road grit, pet waste, treated lawn clippings, mature weed seed, obvious plant disease, and serious insect infestations. A slow leaf pile does not reliably sanitize questionable material.
University of Minnesota Extension's leaf-mulching guidance provides the half-visible lawn threshold used above. Penn State Extension's leaf-recycling guidance also cautions against dumping extra collected leaves onto an existing woodland leaf layer. That area is already habitat. A deliberate pile belongs in a managed spot where it will not bury plants, block drainage, spill into a road, or smother a natural layer that was functioning before cleanup began.
Choose the cheapest container that solves the real problem
Leaf mold does not require an expensive composter. The container has three jobs: keep leaves from blowing away, let air move, and make moisture checks possible. Start with the material and space already available, then buy something only when containment is the repeated failure.
Build the leaf-mold pile in six simple steps
Do not add fertilizer, compost starter, or a pile of grass simply because the leaves are slow. Those additions move the system toward managed compost. That can be useful, but it is a different choice. Plain leaf mold is allowed to take its time.
Keep the pile moist, not waterlogged
Dry leaves can sit nearly unchanged because decomposers need moisture. Saturated, tightly packed leaves can turn slimy and sour because air has been pushed out. Reach into the pile rather than judging only the exposed top. A handful should feel damp throughout but should not release a stream of water when squeezed.
Decide what to shred and what to leave whole
Shredding collected leaves creates more surface area and can shorten the wait. Illinois Extension's guide to reusing fallen leaves also notes that shredded leaves are less likely to blow away or form a water-blocking mat when used as mulch. But speed is not the only value in the yard. Whole leaves in appropriate habitat areas can shelter overwintering insects and other wildlife.
The practical answer is zoning. Leave suitable whole-leaf habitat where it belongs. Mulch-mow a reasonable amount into lawn. Shred the clean excess that you deliberately move into a managed garden system if faster breakdown matters. The goal is not to make every leaf perform the same job.
Know when leaf mold is ready to use
Finished leaf mold is dark brown to nearly black, crumbly, and earthy-smelling. A few veins, stems, or recognizable pieces do not ruin it when it is being used as mulch. If the material is still mostly dry stacked leaves, give it more moisture and time. If it smells sour, feels slimy, or contains intact trash and diseased debris, solve that problem before spreading it.
When you apply it as surface mulch, use the same restraint as any other organic material: keep it away from plant stems and tree trunks, watch how water moves through it, and check beneath it before adding more. The beginner vegetable-garden mulch guide covers that maintenance step in detail.
A realistic first leaf-mold setup
Imagine a small yard with one mature shade tree, a modest vegetable bed, a lawn that still needs light, and no interest in turning fall cleanup into a construction project. The household leaves a light layer beneath the tree and in a perennial border, mulch-mows what the lawn can handle, and gathers the remaining clean leaves from paths and the vegetable bed.
A three-foot wire ring in a sheltered corner holds the excess. The leaves go in damp, the pile gets a date tag, and one person checks the center after dry stretches. There is no promise of spring compost and no weekly turning schedule. By the next growing season, partly broken-down material may be useful as mulch while the rest keeps aging.
That is enough. The system has a place, a purpose, a moisture check, and an honest timeline. A purchased bin, shredder, thermometer, or accelerator would not make the plan more mature unless one of those tools solved a repeated problem.
What matters first and what can wait
Leaf mold is useful because it lets patience do a job that shopping cannot. Keep the pile clean, damp, aerated, and contained. Then go back to the parts of the garden that need you now. The leaves do not need to become another weekly performance.
Build the soil without building a bigger project
Use the beginner garden plan to choose the next useful step
Leaf mold can support better soil, but it works best inside a garden small enough to water, weed, observe, and maintain through an ordinary week.
Open the beginner garden planFrequently asked questions
How long does leaf mold take to make?
Whole leaves in a low-maintenance pile can take a couple of years to become dark, crumbly leaf mold. Shredding the leaves, keeping them evenly damp, containing the pile, and turning it occasionally can shorten the process, sometimes to roughly 6 to 12 months under favorable conditions. Weather, leaf type, particle size, moisture, and management all change the timeline.
Is leaf mold the same as compost?
No. Leaf mold is made mostly or entirely from decomposed leaves and is driven largely by fungi. A managed compost pile combines carbon-rich browns with nitrogen-rich greens and is usually handled to encourage faster, hotter decomposition. Leaf mold is best treated as a slow soil conditioner or mulch, not a complete fertilizer.
Can I make leaf mold in plastic bags?
Yes, if local rules allow it and the bags are reused rather than treated as disposable. Moisten the leaves, make multiple air holes, close the bags loosely, and place them where leakage will not damage a surface. Check occasionally for bone-dry leaves or a waterlogged, sour-smelling mass. A wire ring or open pile uses less plastic and is easier to inspect.
Do I need to shred leaves for leaf mold?
No. Whole leaves will break down, but shredding increases surface area and can speed decomposition. Keep some intact leaf litter in appropriate habitat areas instead of shredding every leaf on the property. For the leaves you deliberately collect into a managed pile, shredding is optional and should fit your time, equipment, and wildlife goals.
Can diseased leaves go into leaf mold?
Keep leaves with visible disease or a serious insect problem out of an ordinary low-maintenance leaf-mold pile. Slow decomposition does not guarantee that every plant pathogen, pest stage, or weed seed will be destroyed. Follow local Extension and yard-waste guidance for questionable material.
Recommendations
Useful tools and resources for this decision
These are included only where they reduce repeated friction, clarify a next step, or help you avoid buying the wrong thing first.
Optional leaf-pile container
GEOBIN expandable compost bin
A lightweight, perforated HDPE ring that adjusts from 24 to 44 inches in diameter and holds 70 to 246 gallons according to the manufacturer's specification sheet.
Best for: A household with enough collected leaves to justify a reusable, freestanding containment ring
Check current priceRead the leaf-mold guide
Penn State Extension: Leaves Are Treasure, Not Trash
A practical guide to whole-leaf piles, leaf mold, stockpiling browns, habitat tradeoffs, moisture, shredding, and realistic timelines.
Best for: Understanding both the low-work method and the reasons not to over-clean natural leaf habitat
View resourceCompare leaf uses
Illinois Extension: How to Reuse Fallen Leaves at Home
Research-based guidance for mulching leaves into lawn, using them in beds, building leaf mold, and avoiding thick mats.
Best for: Choosing where each batch of fall leaves can do the most useful work
View resourceCheck lawn guidance
University of Minnesota Extension leaf-mulching guidance
Current guidance on mowing dry leaves into turf and moving excess leaves when they cover too much of the lawn surface.
Best for: Deciding how much leaf material can stay on lawn before the excess goes to a pile
View resourceCheck manufacturer specifications
Yardfully GEOBIN specification sheet
The manufacturer's February 2024 specification summary for material, height, adjustable diameter, volume, and weight.
Best for: Verifying the exact container dimensions before deciding whether it fits the available space
View resourceRecommended next reads
Read next if it helps the decision
Move into the next guide only if it clarifies the next practical step.

Gardening
How to Start Composting for Beginners Without Making a Mess
Composting is one of the simplest homestead skills to start early, but beginners often make it too complicated. Here is how to begin with a small, clean system that actually fits real life.
Gardening
How to Mulch a Beginner Vegetable Garden Without Overthinking It
A practical beginner guide to mulching a first vegetable garden: what mulch to use, how deep to apply it, what to keep away from stems, and what can wait.
Gardening
Fall Garden Cleanup for Beginners: What to Remove and Leave
Remove spent vegetable plants, diseased debris, fallen fruit, and seed-heavy weeds, but leave healthy perennial stems and some leaf litter where they support winter habitat.
Garden gear support
Get the buy-first guide before the first garden collects too much gear.
Use the guide to decide which early garden purchases earn money now, which ones can be borrowed, and which ones can wait until the routine proves itself.
Best for: Beginners who keep seeing useful things online and need a disciplined way to decide what actually earns a place.
- A buy now, borrow, wait, or skip framework
- Starter category shortlists
- A three-question purchase test
Garden planning notes, restrained gear decisions, and the guide first.
After signup, the download will unlock right here so you can save or print it.
About the author
William Mock
Founder, writer, and beginner homesteader
William writes from the beginner side of rebuilding after a layoff: homestead plans, family systems, budgets, tools, and the decisions that make a home feel less fragile.
Read why this site existsRelated Guides
Keep building context
Gardening
Fall Garden Cleanup for Beginners: What to Remove and Leave
Remove spent vegetable plants, diseased debris, fallen fruit, and seed-heavy weeds, but leave healthy perennial stems and some leaf litter where they support winter habitat.
Gardening
How to Start Composting for Beginners Without Making a Mess
Composting is one of the simplest homestead skills to start early, but beginners often make it too complicated. Here is how to begin with a small, clean system that actually fits real life.
Gardening
How to Mulch a Beginner Vegetable Garden Without Overthinking It
A practical beginner guide to mulching a first vegetable garden: what mulch to use, how deep to apply it, what to keep away from stems, and what can wait.